
How to Connect to Your Facebook Group for Use in the Social Planner
The Social Planner tool allows you to connect multiple social media accounts and manage them in one area. By connecting Facebook Groups, you can use the Social Planner to schedule, create, and push out posts to your Facebook Groups, along with Facebook Pages, Instagram, and Google My Business.
Note:
1. Ensure you have an Admin role for the Facebook group. Check out Facebook’s “Group Management for Admins” if you need further assistance.
2. Add “Lead Connector” as an authorized app for the Facebook Group. Check out Facebook’s article “How do I add an app to a Facebook group I admin?”
Step One: Gaining Admin Access to the Facebook Group
Request Admin Role:
▪️Ask an existing admin of the group to add your page as an admin.
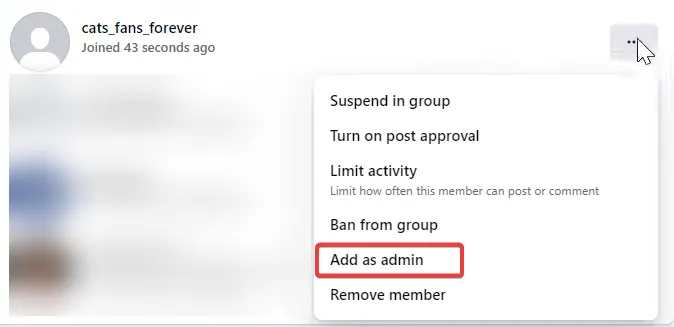
▪️If you are the group's admin on your personal Facebook account, you can send the “Add as admin” request to your page.
▪️You can do that by going to the member’s page, locating the page you’ve added to the group, and selecting “add as admin.”
Accept Admin Invitation:
▪️Once the invite has been sent, switch to your page and accept the invitation to become an admin.

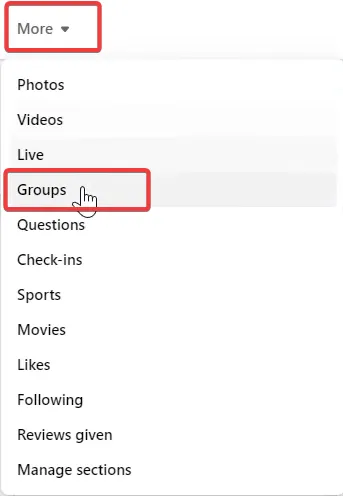
▪️Click “More” and then select “Groups.” The group should now appear on your Facebook page. This will enable you to post in groups as the facebook page.

Step 2: Add the App to your Facebook Group
▪️From your Facebook Feed, click on Groups in the left-hand menu.
▪️Select your group. (If you do not see Groups, click “See more.”)
▪️Click “Group Settings”.
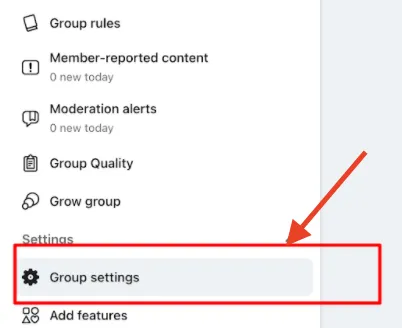
Scroll down and click the pencil icon.
▪️Click “Add Apps”.
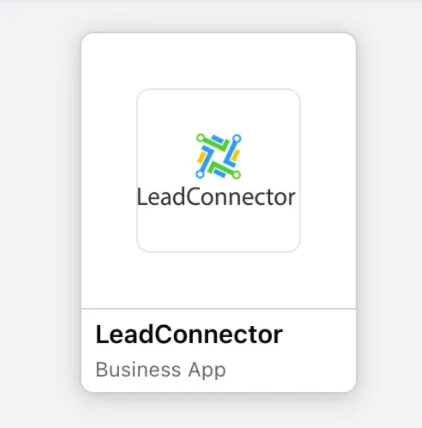
▪️Select or Search for LeadConnector and add the App.
▪️NOTE: Facebook’s API changes allow you to add pages/groups from multiple profiles, but you cannot connect personal Facebook profiles.
Step 3: Add The Facebook Group to your Social Planner
▪️Go to Apex Solutions Pro > Marketing > Social Planner > Settings (gear icon) in the top right corner.

▪️Click “Connect a new Facebook Group Page and Group.”
▪️If connecting any profile for the first time, you will have to enable permissions for LeadConnector.
▪️Click Continue
▪️Select the group(s) you wish to connect. You’ll see a list of all the groups connected to your profile. Select the one(s) you wish to connect to the Social Planner.
You can manage all of your accounts from the Settings icon anytime. Add, change, or remove connected pages and groups anytime.

In-Person Signatures for Mobile Payments
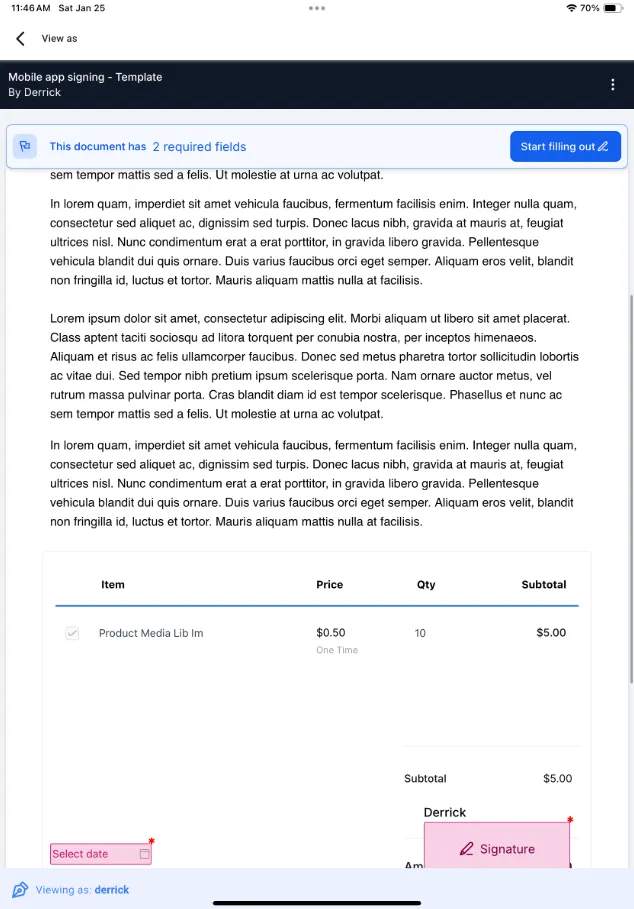
The in-person signing feature allows users to accept signatures directly within the mobile app, simplifying the document completion process. You can create a document with signature fields (within the Web app), open it for signers, and collect their signatures using text or free-hand drawing on your device. This process is done in person.
▪️Create a document using a template with signature fields (within the Web app) and publish it.
▪️After preparing the document for publishing, tap the share button to copy the link, then exit the editor and return to the “All Documents” tab.
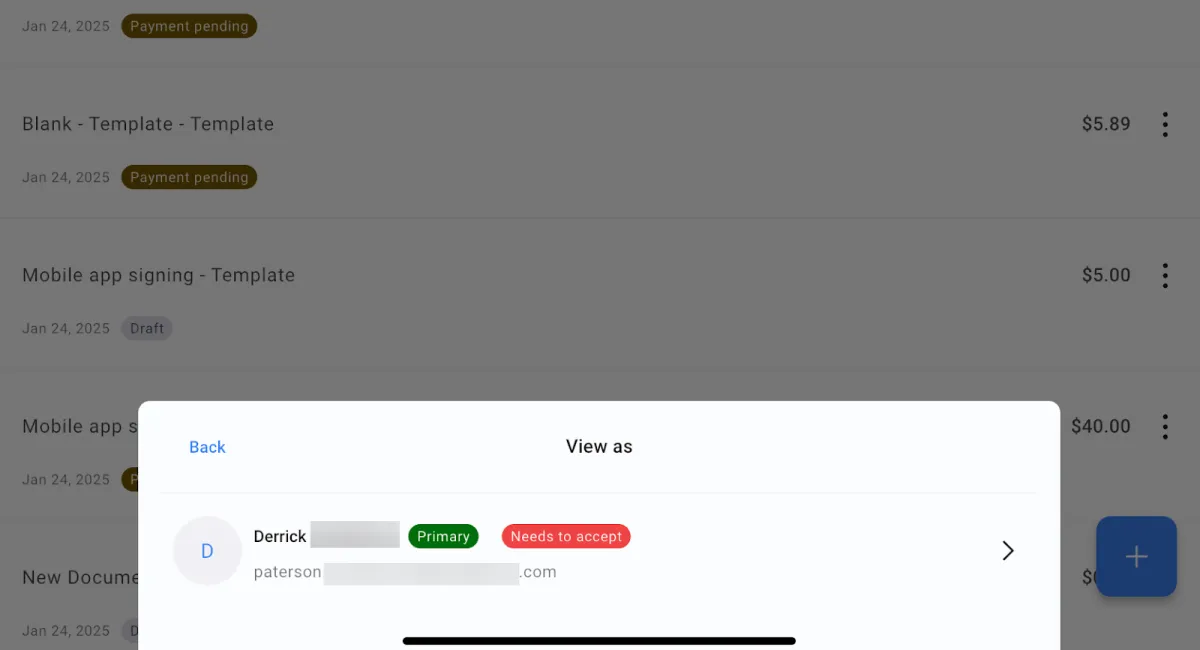
▪️Open the document from the All Documents tab and use the View as option to select a recipient.
▪️Note: Refresh the tab to ensure the document is marked as “Sent” before proceeding with signatures.
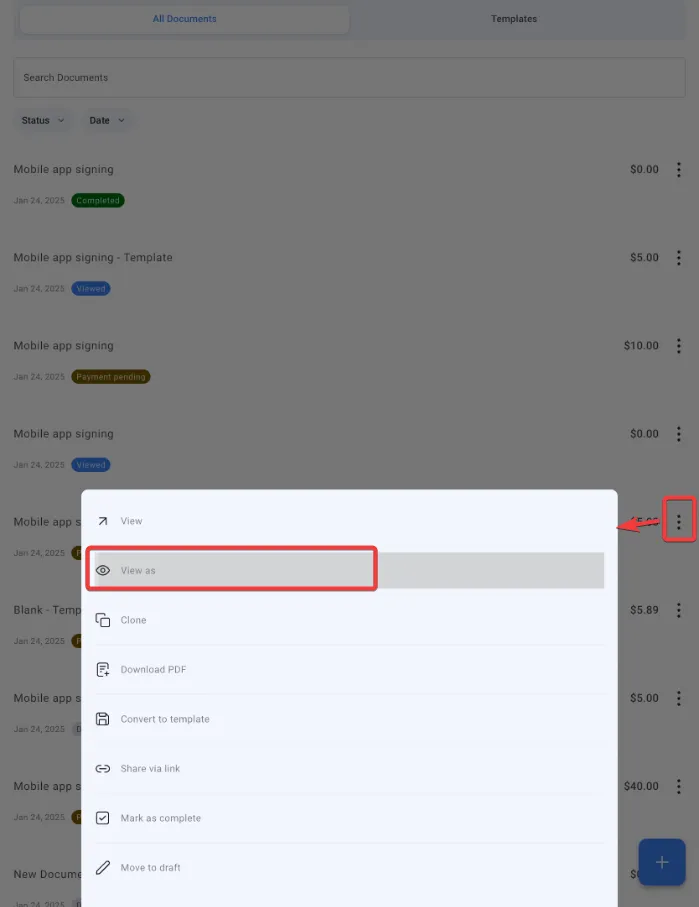
▪️Hand your device to the recipient to sign directly within the app.
Pro Tips
▪️Prepare in Advance: Ensure all templates are saved on the Apex Solutions Pro web platform, as the mobile app does not currently support creating documents from scratch.
▪️Review Before Sending: Double-check document details, especially if adding items from the product catalog, to avoid errors.
▪️Use Unique Links for Secure Sharing: Generating a link is ideal for sharing documents securely with clients who prefer direct access.
▪️Organize Documents: Regularly update and manage drafts and templates to maintain a clean and efficient workflow.
FAQ
Q: What can I do with the Social Planner tool?
A: The Social Planner tool allows you to connect and manage multiple social media accounts, including Facebook Groups, Facebook Pages, Instagram, and Google My Business, in one area.
Q: What do I need to set up before connecting a Facebook Group to the Social Planner?
A: You need to ensure that you have an Admin role for the Facebook Group and add "Lead Connector" as an authorized app for the group.
Q: How do I add an app to my Facebook Group?
A: Go to your Facebook Feed, click "Groups" in the left-hand menu, select your group, click "Group Settings," scroll down, click the pencil icon, and then click "Add Apps." Search for and add "LeadConnector" as the app.
Q: Can I connect personal Facebook profiles to the Social Planner?
A: No, you cannot connect personal Facebook profiles. Facebook’s API only allows you to connect pages and groups from multiple profiles.
Q: Can I manage my connected accounts after setup?
A: Yes, you can manage all your connected accounts from the Settings icon. You can add, change, or remove connected pages and groups anytime.
Easily Integrates with Leading Apps


Copyright Apex Team 2024 -- All Rights Reserved
We’re on a mission to build a better future where technology creates good jobs for everyone.